


A low-energy project by Michael Einermann, working with Kent Webster of Webster Construction, in Marlboro, VT, elegantly illustrates the simplicity of high-performance construction with vapour open walls and roof. A builder, Michael, together with his wife Jesse, started constructing a house for themselves in the summer of 2013. They like small spaces, and value energy efficiency. Their budget was tight, but between savings and loans, they took the plunge and created a gem.

Michael reached out to Ken Levenson at 475 for ideas on how to apply Pro Clima high performance products to the project. Ken recommended wall and roof assemblies that are not only extremely airtight, but also “vapour open” for optimal drying potential. (We’re happy to make assembly recommendations for all types of projects. To get you started, our DWG Construction Details are available for free download – and ready to adapt to your high performance projects.)

If you live in rural Vermont, chances are you have ready access to a saw mill within 20 miles. Michael already had a stack of locally milled lumber when the project started. Unlike OSB or plywood sheathing, solid wood lumber has relatively high permeability, even in winter – around 10 perms (due to leakage at the joints) – so assemblies can dry outward during the heating season in cold climates. This is how folks used to build sturdy – though leaky -wood-framed houses in the old days. Despite the small footprint, diagonal bracing was used wherever possible to create a rigid structure.
Today of course we also want to make our assemblies highly insulated and airtight for energy efficiency and comfort. Pro Clima SOLITEX Mento 1000 is a monolithic membrane that’s easy to detail for continuous airtightness. It’s also an ideal WRB (weather resistant barrier, aka “housewrap”) for vapour open construction because it’s exceptionally waterproof yet actively vapour open to 38 perms – ensuring that enclosures stay dry from outside and inside (see here). For this project, Michael and Jesse stapled Mento 1000 to the wood sheathing, lapping the seams and taping with TESCON Vana for long-lasting airtightness. The membrane was also taped to the foundation for continuous air tightness all around the enclosure. Battens were added for a vented rainscreen to enhance drying.

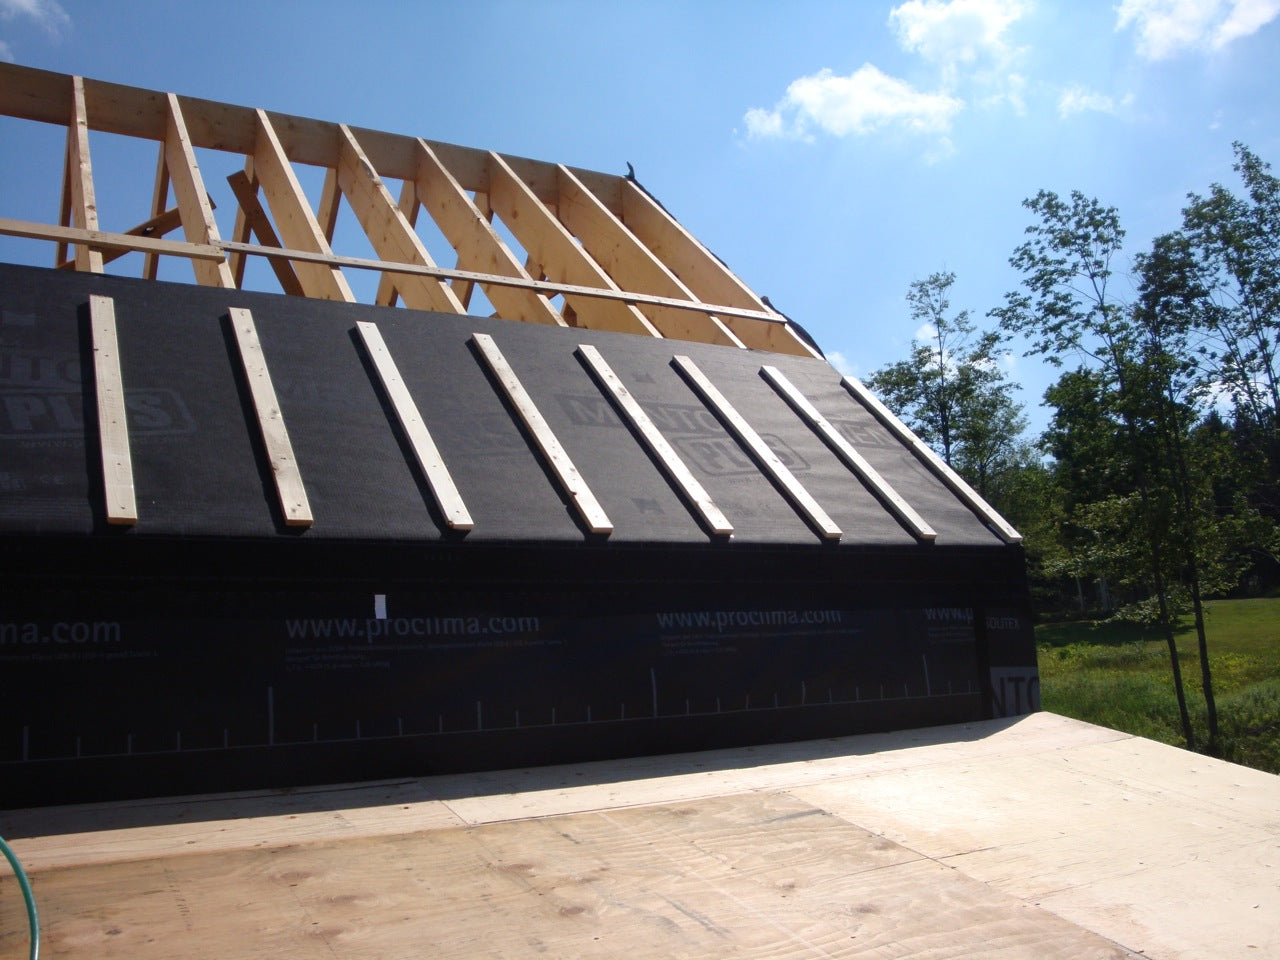
To build a vapour open roof, Michael stapled SOLITEX Mento Plus directly to the rafters. The added reinforcement of Mento Plus resists pressure from the densepack cellulose insulation planned for the rafter cavities. The SOLITEX goes on taut and flat like a drum – and wraps tight down to the wall for a seamless airtight layer. Next, Michael added a vented rainscreen for the roof with vertical battens fastened through to the rafters. With this step, the vapour open assemblies can vent continuously from the foundation to the ridge. To ensure a robust leak-free roof, double-sided TESCON NAIDECK tape was added between the battens and membrane to seal any nail/screw penetrations. (Note: if your local code official requires a sheathing layer directly on the rafters, a vapour open assembly can still be achieved using board sheathing along with SOLITEX Mento 1000).

Installation of roof membrane, battens and wood sheathing was done in stages to make the roof more accessible as construction progressed. This type of roof is quite common across Europe, so methods have been worked out to optimize the workflow. If rain is forecast, the priority should be to weatherproof the structure by first completing the ship lapping and taping of the membrane. Care must be taken to secure the battens to the rafters and sheathing to the battens to make sure the membrane stays intact.

To complete the roof, Michael and Jesse added an overhang in the form of an applied eave over the new airtight layer. This roof element was fastened through to the wall structure - but on top of the rainscreen wall – so venting could continue unimpeded underneath it. This step greatly increases the chances of an optimal result in the blower door test, as well as a dryer roof.
The airtight exterior and cladding layers were completed before winter. An important step included taping the SOLITEX Mento 1000 from the walls to the foundation. After the completion of the air barrier, a preliminary blower door test showed 1.2 ACH50. Interior work continued through the winter. With densepack cellulose insulation done, and having taken an airtightness class with Bill Hulstrunk at Yestermorrow, Michael took Bill up on his offer, to all participants, to blower door test any project that used National Fiber cellulose. We like cellulose for it’s low embodied energy and hygroscopic properties that enhance the drying potential of assemblies. The final blower door with Bill came in at a very impressive 0.8ACH50.

